First things first: I must preface this post by explaining that I am NOT an expert at live video. I’ve had quite a bit of practice since it rolled out last year, but I’m still awkward and nervous as all get out every single time. As uncomfortable as live video makes me, I keep getting back on the horse because I have seen how far-reaching it can be.
We all know that Facebook has all but killed organic reach for business pages, which is why I put much more time and attention into my Instagram feed these days. However, since Listen & Learn Music has a pretty decent following on Facebook (which doesn’t even touch our Music Therapy Connections reach…#goals) I want to foster those connections. And since Facebook puts a high priority on live video and allows it to reach more people organically than other kinds of posts, it only makes sense to get in front of the camera.
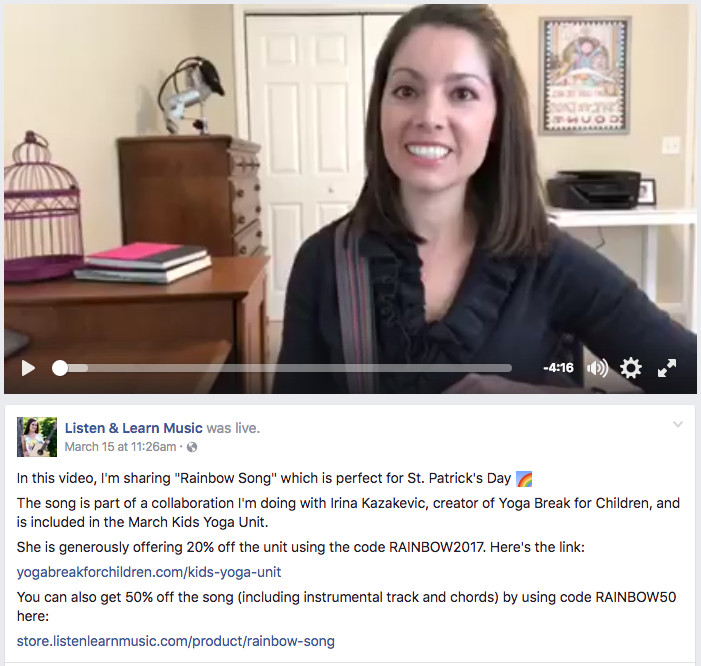
I put a screenshot of a recent live video at the top of this post to illustrate how it shows up in the newsfeed. (If you click on the image, it will take you to the actual video.) I’ll be referring to it in several of my quick tips, which are as follows.
1. Prepare your environment. The beauty of live video is that no one expects it to be as curated as a prepared and edited video, but you should still take a few steps to make sure your surroundings are not a distraction. Since you’ll most likely be using the forward-facing camera, you can check to make sure you are fully in the frame, well-lit, and that the camera isn’t obstructed by anything.
2. Use a tripod. You’ll want your shot to be stable, so using a tripod to situate your mobile device is (in my opinion) a necessity. I have this one, which costs less than $15.
3. Put your phone on airplane mode. I learned this lesson the hard way, when my live broadcast was interrupted by phone calls on more than one occasion. When someone calls you during a live broadcast, the video is interrupted for however long your phone is ringing. Not cool. But switching to airplane mode and turning on your wifi is an easy fix.
4. Make sure your wifi signal is strong. I’ve also had live broadcasts interrupted or ended because of a weak wifi connection. Facebook will usually let you know before you go live if you had a poor signal, so heed that warning and head to a better location before you start broadcasting.
5. Give your audience a reason to watch in the description. If they don’t know what they are getting out of your live broadcast, chances are, they aren’t going to watch (either live or the replay). If you mention websites or resources in the video, plan accordingly and include those links in the description as well. You can always go back and edit the description afterwards.
6. Make notes for yourself. I like to jot down bullet points in big print on a sheet of paper and then tape it up next to my phone. But whatever you do, don’t read verbatim during your live video. These are meant to be casual and off the cuff.
7. Don’t take yourself too seriously. Most likely, you’re going to be nervous and make some mistakes. I constantly trip over my words and have to correct myself, but I just remind myself that I’m letting people see the real me — without any filters or editing. It gets easier with time, though the nerves never completely go away (for me, at least).
8. Share your video. After your broadcast is over, you have the option to save the video to your device. Definitely do this! That way, you can upload to your YouTube channel if you have one, and even post a teaser on Instagram. Within Facebook, you can share the live video to your personal page, another business page, or inside a group. Facebook will also provide embed code so that you can create a blog post using your video.
There you have it — my 8 quick tips for live video broadcasts. Have you taken the plunge yet? I still have to psych myself up every single time, but it’s worth the butterflies and awkwardness. If you have any tips to add, I would love for you to share!