by Rachel | Uncategorized
 I love this illustration (source), because it totally reflects my feelings about Dropbox and how it has changed the way I share files. I split my work between my laptop at home and my laptop at work, so up until recently, I’ve relied on USB flash drives, sending emails to myself, and uploading files to MobileMe in order to access them in both places. Not anymore!
I have to credit Kimberly S. Moore with introducing me to Dropbox, which is a free application you can download from the internet to any computer (both Mac and PC) or mobile device. The free account gives you 2 gigabytes of storage, though you can pay a monthly fee for more.
What I love is that Dropbox works just like another folder on your computer, so now instead of saving a copy of a document or project on both my computer and in another location, I can simply save it to Dropbox and then it’s right there when I need to access it from another computer.
Another cool feature is the ability to share folders with other people. I share a folder with my Music Therapy Round Table cohosts and another with my husband. It’s like magic: new files just appear in the folder when other people add them!
Just yesterday, I recorded instrumental tracks for 9 new songs at work. Instead of compressing the Garageband projects into a zip file and saving them to my USB flashdrive, I simply saved them to Dropbox as-is and then opened them right up on my home computer to record the vocals. Then I saved the WAV files to Dropbox, and am listening to them now as I type this :)
Have you used Dropbox yet? If you work on multiple computers like I do, or want to access files on your phone, give it a try. And then come back and tell me how much you love it!
by Rachel | Uncategorized

When Listen & Learn made the move from Blogger to WordPress last summer, there was no question as to which theme I was going to use.
Not only did my good friend the Music Therapy Maven use and recommend the premium theme Thesis, but I saw it pop up all over the blogosphere on a daily basis.
I wanted a theme that I would be able to customize myself to keep Listen & Learn’s signature look, not to mention one that would help boost my presence in the search engines. Thesis was a bit of a financial investment at $87, but it didn’t take long before I shelled out the additional $77 for the Developer’s Option Upgrade, which allows me to install Thesis on any and all of the domains I own.
I’m in love with my theme, which is why I saved this “Friday Fave” for Valentine’s Day week. From the many font options, to its search engine optimization capabilities, to the sheer ease of use, Thesis truly takes the intimidation factor out of WordPress.
In fact, I’m using Thesis to roll out yet another website — but more about that another time. A girl’s got to keep some of her secrets under wraps! ;)
by Rachel | Uncategorized

Today’s Friday Fave is actually a spin-off of yesterday’s guest post at Time for Music, which is the second installment of my “Adventures in Songwriting” series. I mentioned that I use the voice memo app during the songwriting process, and Susan of the wonderful blog Make Me Musical wanted to hear more about it.
I wrote about my favorite iPhone apps around this time last year, but lo and behold, I failed to mention voice memos. I keep my iPhone next to me while I write my songs, first so that I can tune my guitar using the Cleartune app, and second, so that I don’t lose my melodies before I get them down on paper.
As I mentioned while describing my songwriting process, the melody usually comes to me organically as I’m writing the lyrics. I don’t like to switch gears between perfecting the words and figuring out chords, so I simply open the voice memo app (which comes already installed on the iPhone) and hit record. That way I can sing or hum the melody and save it for later.
Not only does this app let me save my voice memos under a custom title, but when I sync my phone to my laptop, they automatically transfer to a dedicated iTunes playlist. These features come in extremely handy when I use voice memos during my lessons and music therapy sessions. Often I’ll record a piece of music for a student, download it to my computer, and then pop it onto his or her USB flashdrive for practice purposes.
I’d love to hear about other uses for the voice memo app. iPhone users: any tips to share? Bonus points if they’re related to songwriting :) Happy weekend, all!
by Rachel | Uncategorized
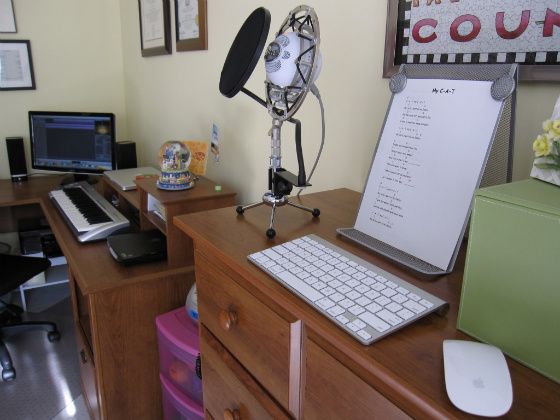
Two years ago, my “home recording studio” consisted of two things: a 13″ Macbook and a $12 Logitech microphone. Though it wasn’t fancy, it did the job, considering I was simply recording music therapy songs for the students at my school. But the more songs I wrote and the more interested I became in home recording, the more sophisticated my setup became.
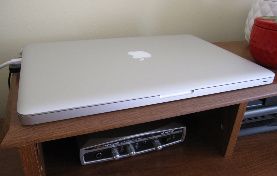
Now that I sell my self-recorded music (in addition, of course, to my studio album) both in my own store and on larger platforms like Songs For Teaching, I have a much higher standard of quality. That comes with a need for higher-quality equipment, which is the topic of today’s post. The picture above gives you an overview of my home studio, but I’m going to break it down for you even further. Let’s go!
The #1 most important component in my setup is my computer. My 15″ Macbook Pro powers the software I use, which is Garageband. This program is included with the price of the computer, and for entry-level software, it is really quite powerful. Although I’m sure there are great recording programs for PC, I am most decidedly a “Mac person” and simply love the intuitive interface, ease of use, and integration of Garageband with iTunes.
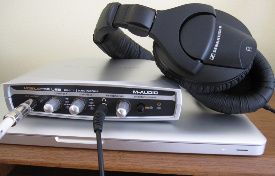
Pictured on the right is my M-Audio USB MobilePre Preamp, which I use to record my acoustic-electric guitar and monitor my sound input. I wrote a detailed post about the preamp earlier this year. The Sennheiser headphones I use are awesome; they cover my ears completely, are crystal-clear, and have a long coiled cord that reaches from one end of my studio to the other.
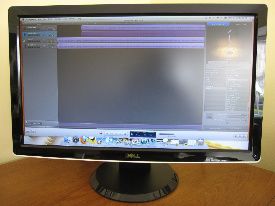
This 24″ Dell HD monitor was a birthday gift from my husband, and for someone who spends so much time in front of the computer, it has truly been a game-changer. The wide screen view is especially useful for Garageband; when I’m tracking instruments and vocals, it’s nice to be able to see big chunks of audio at a time. The monitor is connected to my computer with an HDMI cable and adapter.
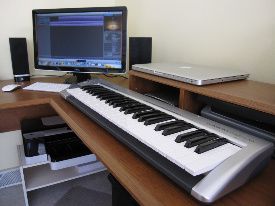
Next is my M-Audio midi keyboard, which I use to record keyboard and other instrument sounds. It connects via a USB cable, so basically, all I have to do is plug in (Garageband immediately recognizes the MIDI input) and then I’m ready to play. I have a super duper deluxe model at school, which has so many features I haven’t even learned half of them yet. That will be a project in itself when school starts!
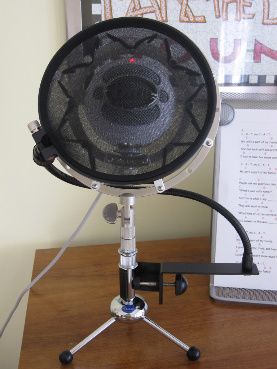
The piece of equipment that I’ve had the longest (December of 2008) and that I recommend to anyone who asks is my Blue Snowball USB Microphone . I get lots and lots of emails from people wanting to know what I use to record my vocals, and I delight in telling them that it’s a simple USB mic that costs less than $100. I have a ringer shockmount
 attached as well as a pop filter
 .
.
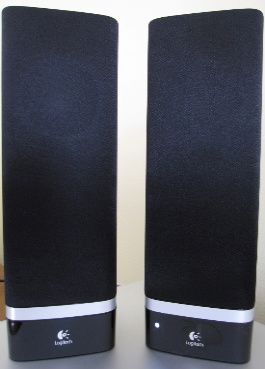
My speakers are relatively new, and I’m head over heels about them. These Logitech Omnidirectional USB Speakers are inexpensive, loud, and high-quality. They also look really nice! Although I listen to all of my recordings through headphones, I also want to make sure they sound good through speakers, since that is how most other people will be listening to the songs.
If you’ve been keeping track, you’ve noticed that 4 of the pieces of equipment I’ve covered connect via a USB port. Any Mac user knows that the computer only offers 2 USB ports, which is why I use a Rocketfish USB Hub to power my entire studio without plugging and unplugging anything. It only takes up one USB port on my computer, and the best part is that it has a suction cup, so I can attach it to the backside of my desk in order to hide the spaghetti factory of wires and cords.
Two last pieces of equipment to mention, and then I promise I’ll end this insanely long post :) These are crucial if you use an external monitor: the Apple Wireless Keyboard and Magic Mouse. As you can see in the first picture, I record my vocals relatively far away from my computer and monitor, so instead of walking back and forth in between takes, I can bring my keyboard and mouse over to control things remotely.
So there you have it: the Listen & Learn home recording studio. There are definitely things I’d like to add to it over time, but for now, I’m quite happy with it. I’m also more than happy to answer any questions you might have about the equipment I’ve mentioned, or just home recording in general. Let’s tackle them in the comments!
by Rachel | Uncategorized
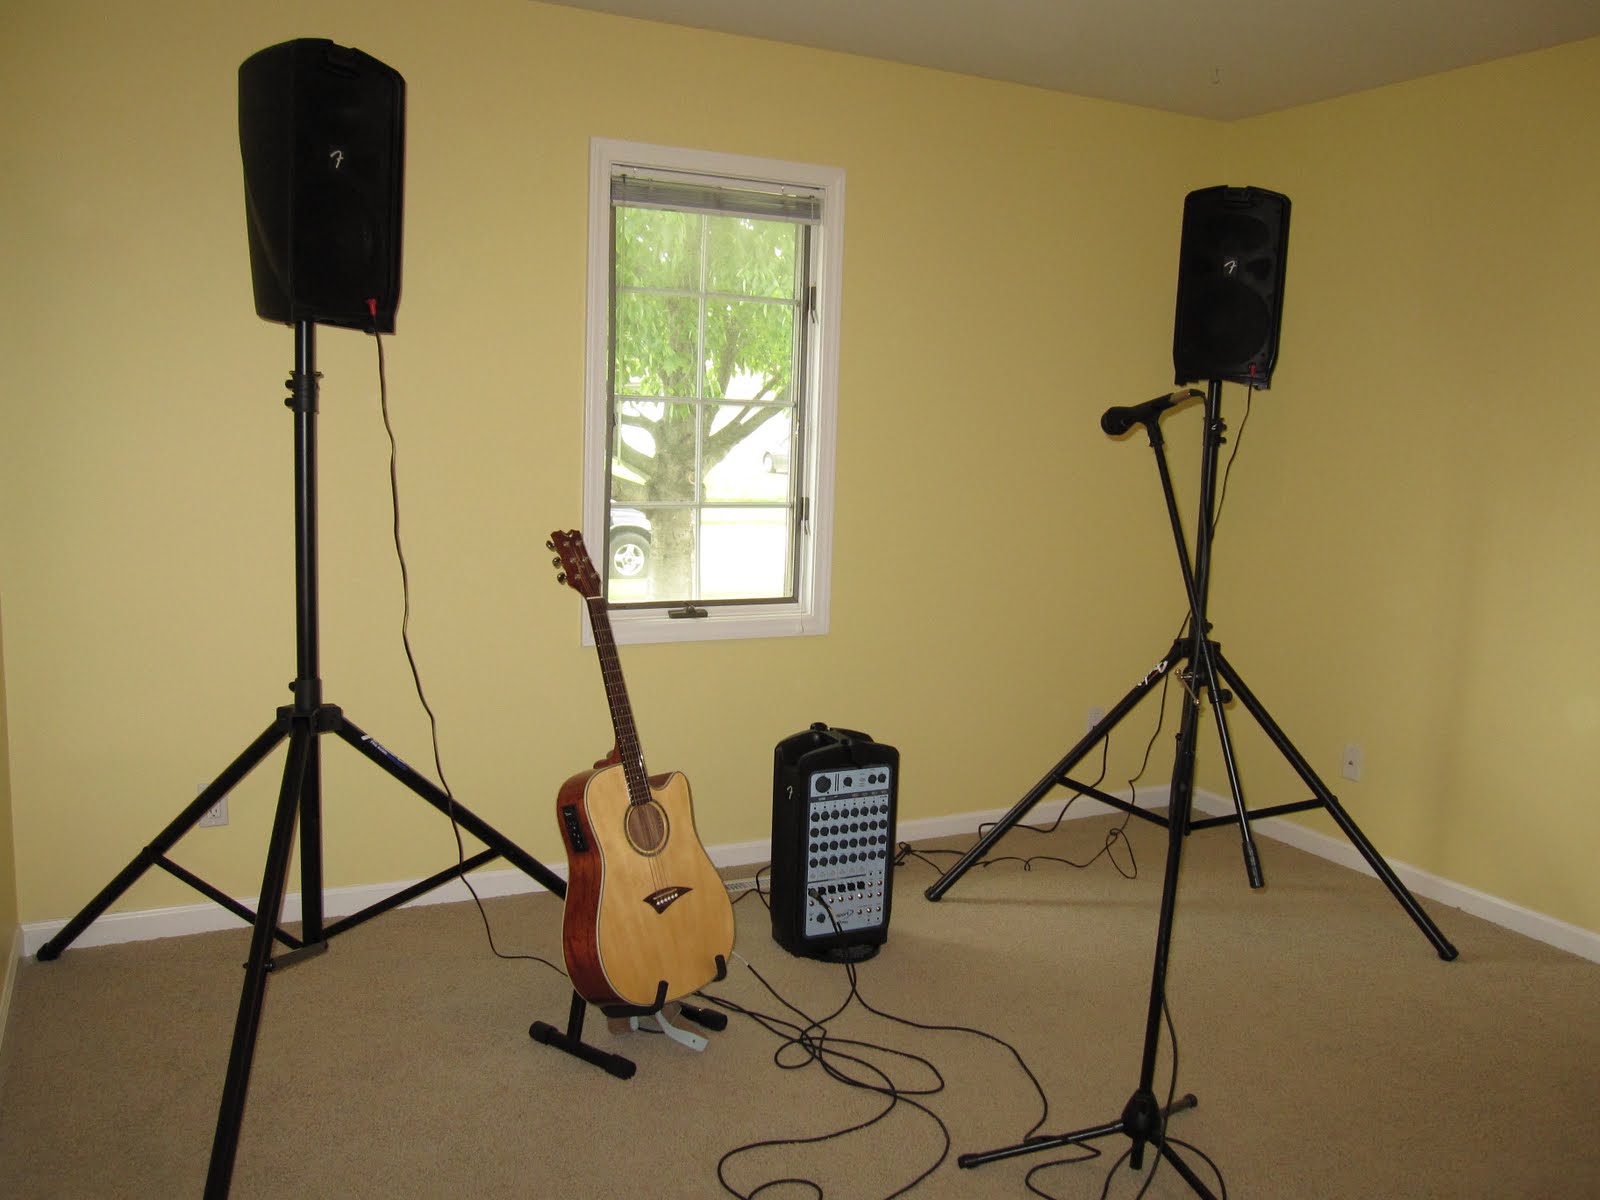
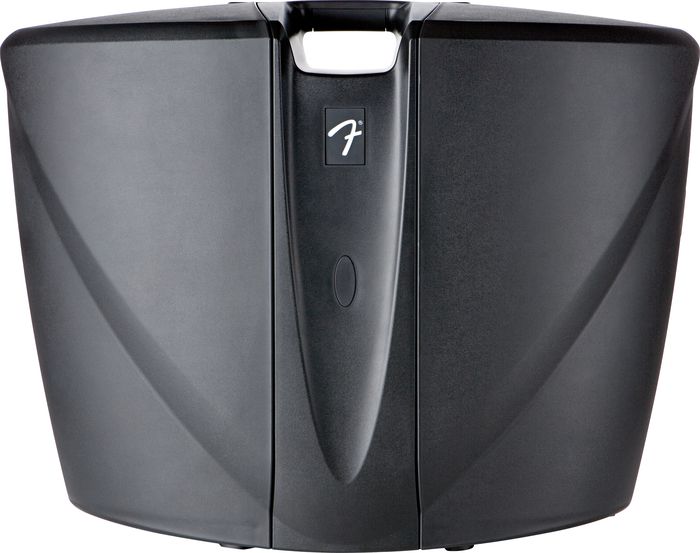
A Fender Passport 500 Pro, that is, which will hit the road with me for gigs and performances from now on. I was so excited for it to arrive that I immediately took it out of the box and tried it out. My new sound system has completely taken over one of our spare bedrooms, as you can see:
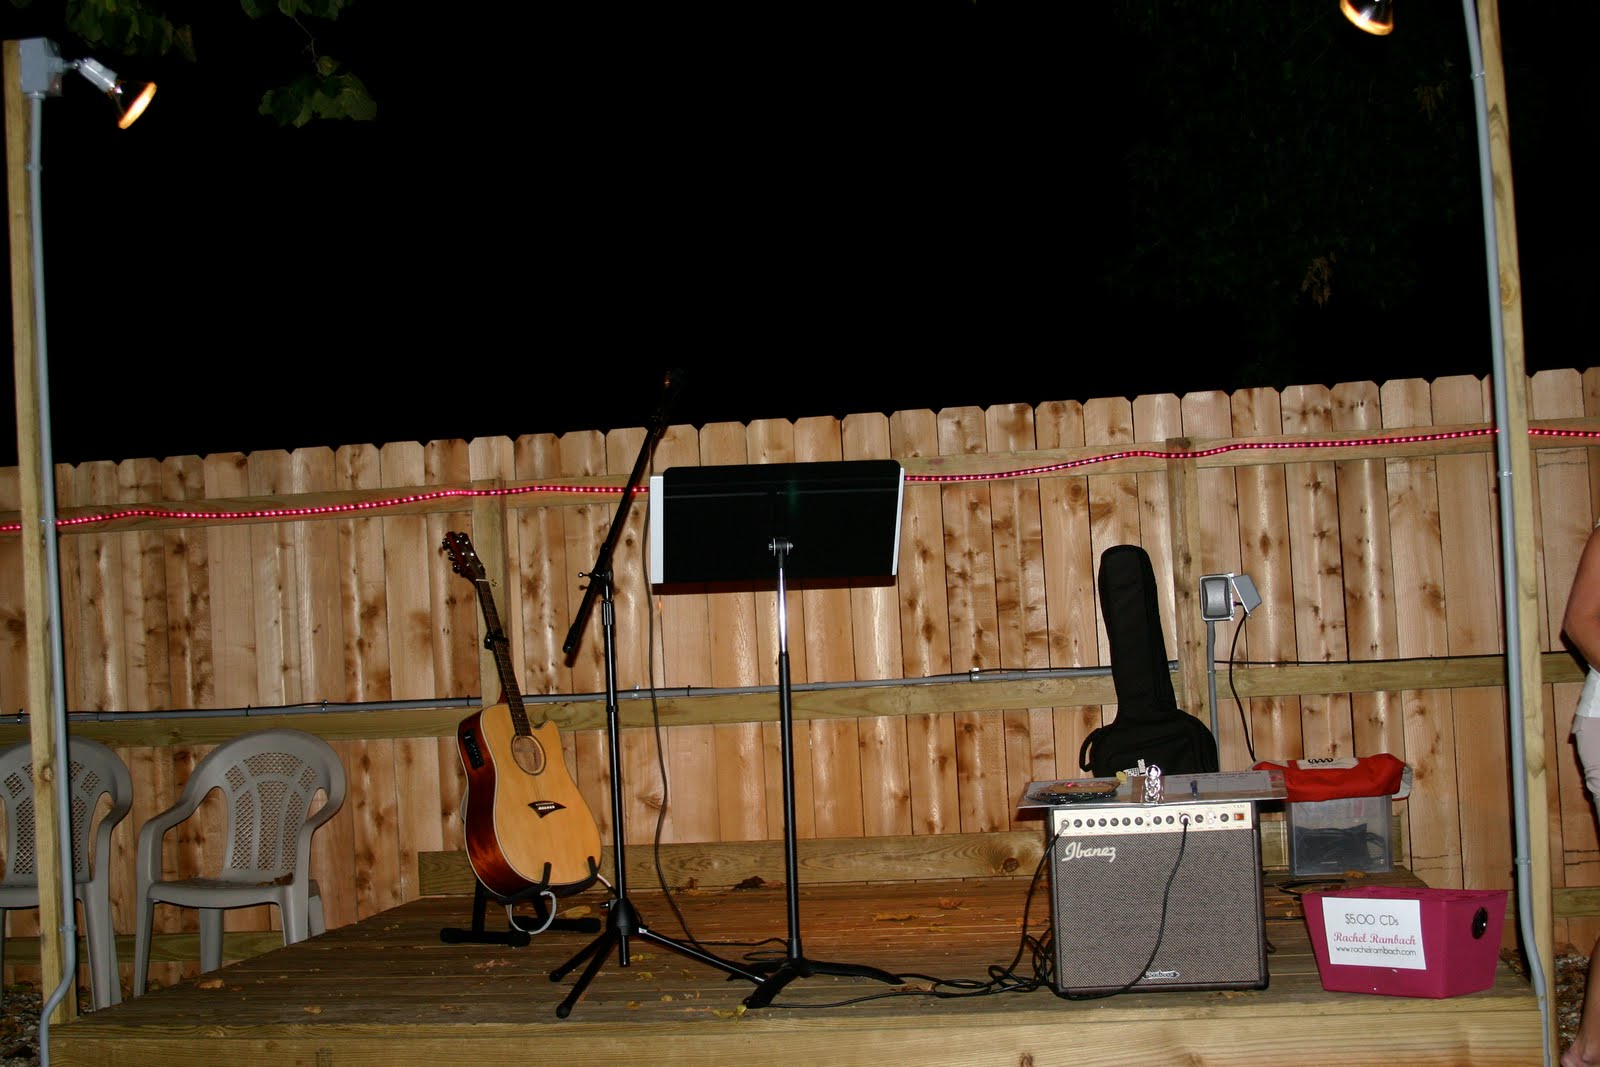
The sound is a little overwhelming in this space, but it’s perfect for the bigger venues in which I perform around Springfield. The Passport is quite an upgrade from my little Ibanez amp (which I actually featured as my first-ever Friday Fave). Here’s my previous set-up:
It looks so very sad in comparison! But there really is no comparing the sound output of the two systems, not to mention the capabilities of each. The Passport has an eight-channel mixer, CD-quality .wav and mp3 file playback, and even a port that lets me record my performances with CD quality (.wav) straight to a USB flash drive. How cool is that? The best part is that the speakers attach to the mixer, which makes it super easy (and surprisingly light!) to transport:
I’ll be posting a few more pics on my Facebook page, so be sure to stop by and check them out. My next gig just happens to be next weekend, and I can’t wait to put my new sound system to use. Speaking of, I’d better go rehearse (in my newly converted rehearsal space). Ciao!